This tutorial requires that you are logged in to your website as an administrator.
To edit a product’s options you can do this either through the admin console, or from the front of your website using the admin bar at the top of the browser when you’re viewing the pages.
Via the admin
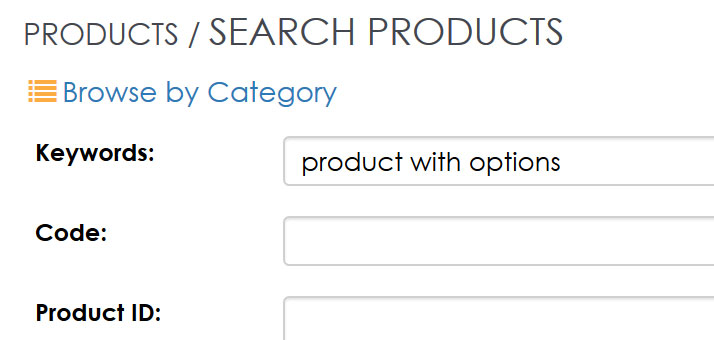
– go to “Products” > “Manage Products”
– use the search form to search for the product you wish to edit
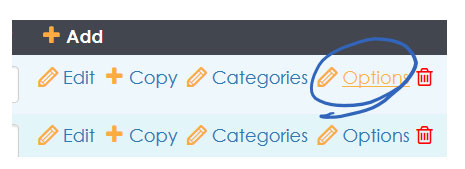
– Click on “Options” adjacent to the product you wish to edit
Via the front end
Locate and view the full detail of the product you wish to edit in the front of your shop. In the admin bar you should see links that make it easy for you to edit that product. Click on “Options” in the admin menu of the page.

Editing the Options
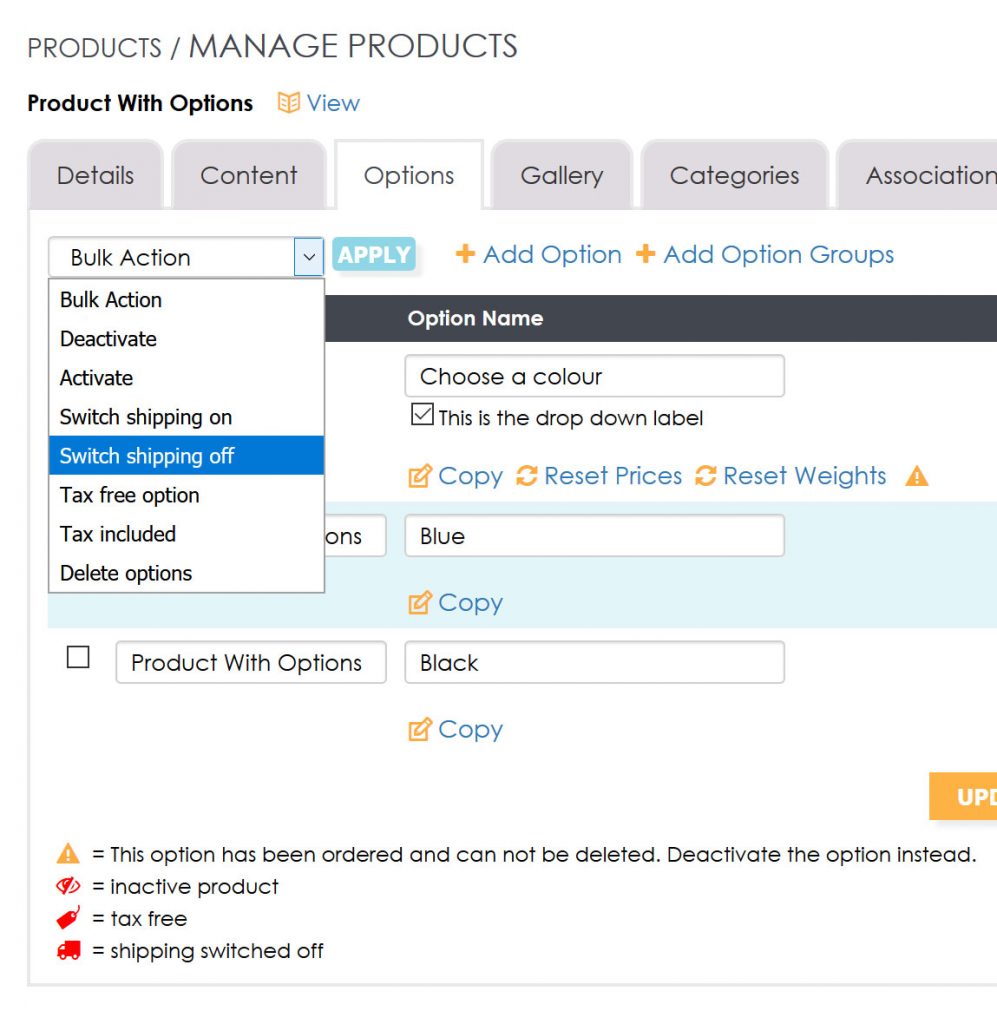
From this page you can edit the pricing, naming and order of the options on this particular product.
We’ll use the below image to outline each part of the page and what you can edit:
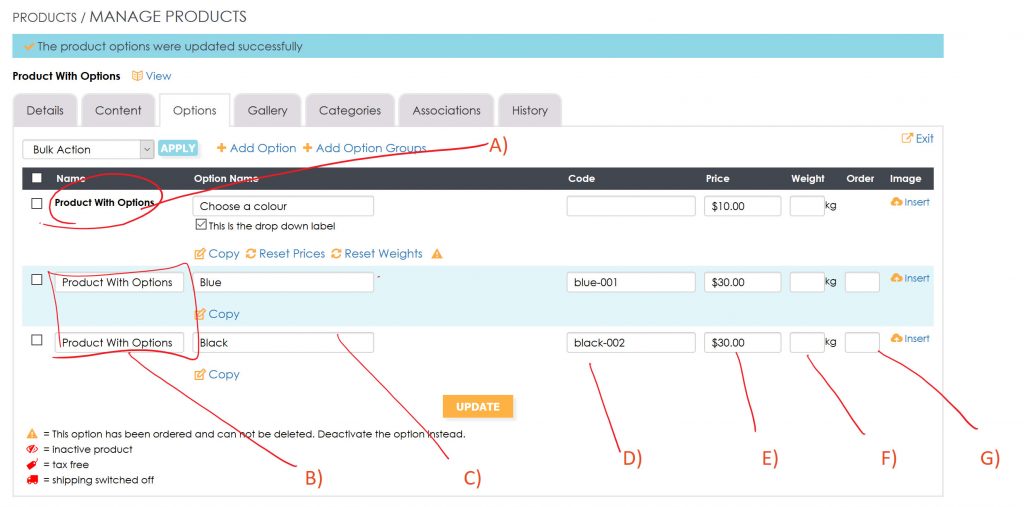 A) Master Product – The product name in bold is the master product which was created on the “Content”/”Details” tab. This is your main Product Heading and price, the options under this are all additional options created for the product.
b) Name Column – It is possible to change the Product Name along with your option label or name, but in most cases you will want to keep the Product Name exactly the same so that you can identify this product internally. The Option Name in the next column is what you use to change the drop down label text.
c) Option Name – This is option identifier, ie. Black, Blue, Grey or the text you want your customers to see as the options that they can choose.
d) Code – The product code or SKU identifier you will use to identify the product can be changed to match each option.
e) Price – You can quickly and easily update the pricing of all the options on this page. You may have product options at a different price to the Master Product. The prices are totals, and not in addition to the Master Product.
f) Weight – If your product options are different weights than the Master Product please update the weight here as it will be used in Shipping Calculations. If it’s left blank the Master Product weight found on the “Details” tab will be used.
g) Order – The options are ordered by Alphabetical order by default, if you wish to change this order, enter numbers from the lowest to the highest to order the Product Options in your drop down menu.
Adding your first option
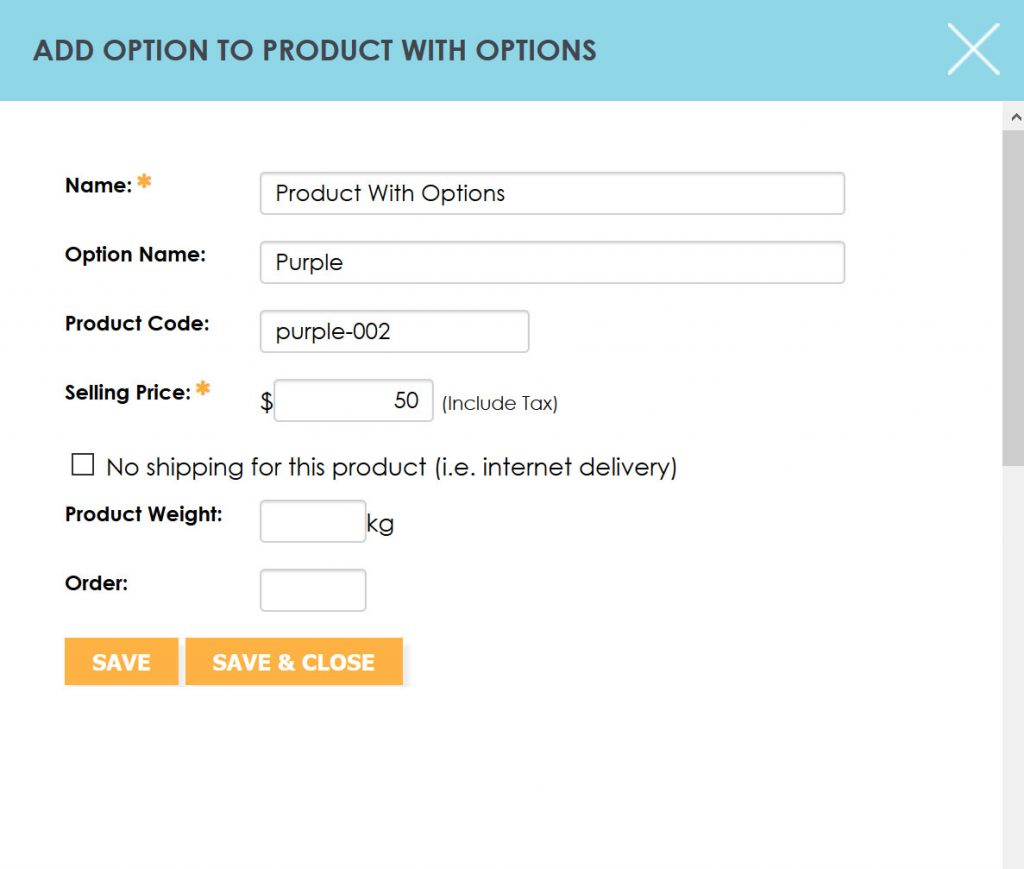
Click “Add Option” above the list to create your first option.

In the Add Options Popup, add in your Option Name, the Product Code, Price and if necessary the Product Weight and Order. Product Weight and Order can be kept blank if you wish to use the default.
NOTE: If you are selling a totally different product as an Option you can change the Product Name using the “Name” field, otherwise keep it the same as the Master Product and set your Options by using the “Option Name” field.
Use the COPY Feature
Once you have your first option in place, use the COPY button to add in more options, then change the Option Name, Price and Code as you need and press the yellow UPDATE button at the bottom.
Bulk Editing
With the Bulk Actions drop down you can:
– Switch shipping on or off on options
– Activate or deactivate options
– Delete product options
– Set the Tax on or off on products
To apply the action you first have to tick the adjacent checkbox to the product, then select your intended action from the drop down and press “GO”.
To edit any Option Name, Product Name, Option Code, Price or Order, make your changes within the page and press UPDATE once you’re happy with all the changes. NOTE: you can do this for all the options at once rather than one at a time.
That should be it! If you have any questions please ask in the comments below.